
Gardener's Guidelines
From about 1760, the Acts of Inclosure changed the way land was owned and worked throughout the country. Until this time peasant farmers were able to work common arable and pasture land to support their families. With enclosure, the commons and open fields were divided into separate parcels of land that were allotted to those who could prove they were entitled to a share of them. Thousands of peasants were unable to prove they had a claim to common rights and so became landless. Many moved into towns and cities to find work or became dependent on poor relief. The Great Somerford (Wiltshire) Inclosure Act of 1806 was the first to make sure land was set aside as allotments for the labouring poor. Many other Acts followed this example and, by 1833, seven counties could claim to have allotments in almost every parish. Allotments also became popular in towns and cities, Birmingham had 'guinea' gardens, mostly used as recreational gardens, where fruit bushes, vegetables and flowers could be grown.
By the twentieth century, there were almost half a million plots in Great Britain but, according to a Land Inquiry Committee of 1913, demand still exceeded supply. With the outbreak of the First World War in 1914, allotments were created by local authorities and by 1918 the number of plots had risen to one and a half million. After the war, land owners who had lost land to allotments wanted it back but, due to high vegetable prices and economic hardship, there continued to be great demand for allotments. The Government introduced several allotment Acts to regulate the situation and for the first time the term allotment garden was used. By the outbreak of World War Two, there were about 570,000 plots and the famous 'Dig for Victory' campaign succeeded in encouraging food growing. The Government estimated that 10% of the nation's food was grown on allotments and private land converted to allotments during the war. After the war, allotments remained important both to national recovery and to families.
Inevitably the number of plots has declined since the war-time peak, but more recently a renewed interest in allotment gardening has been prompted by concerns about the use of agricultural chemicals, genetically modified food, the lack of taste and variety of fruit and vegetables which have travelled long distances causing damage to the environment, coupled with growing interest in organic cultivation.
WHAT CAN YOU GROW?

Where possible, you should plant fruit trees in the middle of your plot, not on the edges where they may cast shade over neighbouring plots. Note: A maximum of 6 dwarf fruit trees are allowed on a plot.
CARING FOR YOUR ALLOTMENT PLOT - MINIMUM STANDARD OF PLOT CULTIVATION
The majority of the plot should be fully cultivated within a complete growing season the rest being allocated to sheds and or greenhouse/poly tunnels, compost bins etc.
Full cultivation means:
1. The plot is in readiness for growing
2. The plot is well stocked with growing produce relevant to the time of year
3. The plot is in the process of being prepared for the following crops or season
Plots must be kept weed free which means:
a) Weed seed-heads should be removed before they have set.
b) Pernicious weeds such as bindweed, couch grass, brambles should be controlled before they have spread.
c) Removal of long grass which may harbour slugs, snails etc.
Paths should be kept trimmed and free of obstructions. The fertility of the soil should be maintained. This can be achieved by incorporating manure (available on site) or other organic material i.e. garden compost. Your plot should be used to grow fruit, vegetables and a variety of flowers if space allows. If you need any help or advice with your plot please contact a committee member. Remember you may lose your plot if you fail to maintain a good standard of cultivation.
GENERAL GUIDELINES - GETTING STARTED
Gardening must be one of the most popular hobbies in the country, so you can easily find magazines, books and television programs full of useful advice. Remember we have a collection of books in the store shed and libraries have a good selection of books for you to borrow free of charge. To help start you on the way to a successful allotment, here are some simple guidelines.
If the plot is overgrown with long grass or weeds such as brambles, you may need to use a strimmer or hedge clippers to cut them down. Treat difficult weeds such as brambles, couch grass and ground elder with a suitable weed-killer at least two weeks before you start cutting them down. This will help to stop them growing back. Check the packaging to see if it is suitable for the types of weeds on your plot. Always read the instructions and follow them carefully.
Store weed-killer in a safe, secure place at home, not on your plot where it is difficult to store it securely. You can compost the weeds you have cut down, but leave them to dry out in the sun first. Never compost weeds sprayed with herbicide.
Don’t try to clear the whole plot straight away. Work on a section at a time, clearing and planting it, before moving on to clear the next patch. This way you will be sure to have something to harvest in your first year.
The best time for digging is autumn or early winter if you want to be ready for seed sowing in spring. Choose a dry spell and remember, if the soil sticks to your boots, it is probably too wet for digging.
SEED SOWING AND PLANTING
Then follow the directions on the seed packet. You will not go far wrong if you follow the golden rules:
• sow when the weather warms up the soil
• cover the seeds with a thin layer of fine soil about as deep as the seed diameter
• sow thinly in rows to make it easy to sort out the weeds from the seedlings.
Most seed packets hold many more seeds than you will need at one sowing. For crops that cannot be stored, such as lettuce, radish and coriander leaves, sow a few seeds every couple of weeks, you should then always have some ready for picking.
THINNING OUT AND TRANSPLANTING
You may need to transplant some crops, such as lettuce and marrows. When the seedlings have produced a few true leaves, they can be transplanted into rows for growing on. Gently lift the seedlings with a hand fork and replant in the new position. Lift the seedlings by a leaf not the stem, for if the stem is damaged the plant will die.
HARVESTING YOUR CROPS
Most crops are best harvested when they are small and tender, especially peas, carrots and beans. Peas especially should be used as soon as possible after picking to obtain the best flavour. With some crops such as marrows, cucumber, peas and beans picking regularly encourages the plants to produce more fruits or pods. Leaving mature fruits or pods on the plant may bring cropping to an end.
ROTATING YOUR CROPS
Crop rotation prevents a build up of pests and diseases. If you grow the same type of vegetable in the same place each year, it will deplete the soil of the nutrients it needs, and pests and diseases will increase. To avoid these problems, rotate your crops. Plant a different type of crop on each part of your plot each year. A simple rotation is shown below:
| Area 1 | Area 2 | Area 3 | |
| Year 1 | Root Crops [eg potatoes, carrots, parsnips] | Brassicas [eg cabbage, sprouts] | Pod & Salad Crops [eg lettuce, peas, onions] |
| Year 2 | Brassicas | Pod & Salad Crops | Root Crops |
| Year 3 | Pod & Salad Crops | Root Crops | Brassicas |
COMPANION PLANTING

GROWING ORGANICALLY

For further information and help you can also join the Henry Doubleday Research Association, (http://www.gardenorganic.org.uk )which is the national charity for organic growing and is a mine of information.
If you want to go organic, use plenty of space and stockpile anything green that you can get hold of for the future. Nettles and long grass from waste ground are marvelous. Fresh ground should grow wonderful potatoes in the first year, with nothing added to the soil.
Just remember to keep the weeds down. Always dig the soil carefully and remove perennial weed roots fastidiously. Dig in manure or compost and sow grazing rye over the first winter and you will have a beautiful, fibrous soil the next spring for peas and beans. You can then add dolomitic limestone and plant over-wintering onions the second winter. So far you should not have needed to use any pesticides. If your crops are attacked, don’t give up, this is usually because of historical build-up. Healthy soil will support a whole chain of predators to do your pest control work for you. You will need to keep the weeds down though.
Organic gardening is all about the health of your soil. By using bulky organic composts instead of rapidly soluble artificial fertilisers, the soil builds up flourishing populations of micro-organisms which allow natural fertility. Most plant composted and dug back into the soil. Dolomitic limestone is a slow release alternative to lime that gently releases lime into the soil over a period of up to two years. It can take some years to get the soil back into good health if it has been exhausted or contaminated by pesticides, but healthy soil will repay you in the long run. Green manures such as grazing rye, buckwheat and field beans work wonders on soil and are an alternative at any time of the year to bare soil, which can be eroded by wind and rain. A clump of the herbaceous plant comfrey may last for years and produces mounds of leaves that, when composted, give a high potash feed, especially good for tomatoes and other fruit.
COMPOST MAKING
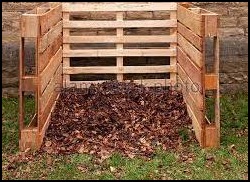
Garden and domestic refuse can be used to make excellent compost. The container used is important, both to tidiness and to holding the heat, making the difference between a compost heap and a rubbish heap. Choose a site in a sheltered place, which can be in a dry shade under a tree where nothing much will grow, but in this position the heap will need watering in dry weather. Level off the ground and flatten it with a spade. Cover the base of the compost heap with tough and stemmy rubbish, such as privet or other hedge clippings or tall tough weeds. This prevents finer materials from blocking the air channels. Then pile on the first 8 inch thick layer of weeds, lawn-mowings and garden waste, with kitchen waste in the middle. Scatter enough dried blood, dried poultry manure or other available manure to cover the surface. Add another 8 inch layer of rubbish, whiten this with lime, pile on a third layer and then add manure or activator again. Repeat this sequence until the container is filled. This is rarely possible in a day as most heaps take weeks to build, adding more layers as they sink and decay until the heap is cold and the worms move in. Other signs that the compost is ready are a faint earthy odour (the only smell), dark brown or black colour and a crumbly texture like well-rotted farmyard manure. Used like manure (though it is richer than potash) it can be dug in before sowing root crops without making them coarse and forky, and with lime, a bucketful a square yard is a fair dressing. Autumn heaps are ready to dig in by Spring and June heaps are mature ready for Autumn digging, so with enough material a container can be filled and emptied 3 times a year. There are many propriety activators which do not need lime layers. Though layers of soil are often recommended, where weeds have soil on the roots, it is unnecessary. Compost producing crops of weed seedlings can result when not enough soil off has been shaken off.
What can go in the Compost Heap
Tea leaves, potato and vegetable peelings of all types, fruit peel and waste, egg shells, fish bones, rags (but not nylon or man-made fibres of any type), paper in small quantities (well scattered through the heap), vacuum cleaner dust, blanket fluff, hair combings etc. Brussel sprout and cabbage stumps will rot if smashed with a hammer and weed roots, such as couch grass, docks, convolvulus and ground elder, can be spread on wire netting to dry out and then be composted. They will then enrich the compost. Seeding weeds and diseased materials are safe in the middle of the heap where it is hottest but do not use clubrooted cabbage or potato haulms.
What to Leave Out
Metal of any kind including bottle tops, broken china, newspaper and cardboard in bulk, polythene and plastics. Tree prunings, pine needles, sawdust wood shavings thick branches and clippings will all decay in time
Kitchen Wastes in Winter
If in winter there are too few weeds to cover the kitchen wastes, bury them in a heap or dig a pea trench a spade wide and a foot deep. Cover it with soil. When the trench is full, scatter Lime generously on the surface and leave to sink. Potato peelings should not go into pea trenches, odd eyes will grow and crowd the peas unless the winter is very cold.
FERTILISERS
There are basically two ways of doing this, first, the ever more popular Organic method which involves a LOT of organic matter and second, the Inorganic method, which is using mainly man made fertilisers.
It's important to understand the difference between manures and fertilisers.
MANURES are bulky materials such as garden compost or animal wastes, which usually contain straw type bedding. Manures do contain some nutrients, but, unless used in very large quantities not enough. They do play a very important part in soil fertility though and should be looked upon as soil conditioners. They are classed as being organic and are slow acting. This means that they provide plants with the nutrients (mostly nitrogen) over a long period of time.
FERTILISERS contain plant foods in concentrated form. These are classed as being organic or inorganic. Organic fertilisers are often of the slow release, whereas inorganic are usually faster acting. They come either as a 'compound' fertiliser which contains a mix of the three major nutrients in varying proportions, or as a 'straight' fertiliser which is only a major nutrient on it's own.
Organic fertilisers are safer to use than inorganic ones and they do not harm the soils natural organisms, in fact they positively help them. They can be spread freely around plants, as there is not as much need to precisely measure them, although it is best not to overdo it. They do depend on the micro-organisms in the soil to break them down though and these organisms are not active in cold, very acidic or waterlogged soils.
Inorganic or artificial fertilisers are minerals extracted from the earth or completely manufactured. Although plants cannot tell the difference in the minerals, it is known that they do damage to soil organisms and they repress the natural nitrogen making activities of bacteria. They need to be measured and applied fairly accurately to avoid damage.
Care should be taken when handling ANY fertiliser and the instructions on the packets should be followed strictly. Using too much can upset the balance of the soil and damage plants by burning them, besides which, it is an unnecessary waste of money.
NUTRIENTS
Both natural and man-made fertilisers are measured by the three MAJOR Nutrients that are in them. These are:
Nitrogen (N), - assists plant in leaf and stem growth.
Phosphorus (P). (More commonly referred to as PHOSPHATE) - assists young plants and root crops to develop good root systems.
Potassium (K) (More commonly referred to as POTASH)- assists plants to produce flowers and fruit.
Fertilisers also contain SECONDARY NUTRIENTS, which are: -
Calcium (CA) - most fruit, flowers, and vegetables need some calcium.
Magnesium (Mg) - Roses and Tomatoes need these most.
Sulphur (S) - most plants.
Fertilisers also contain trace elements, which various plants need. These trace elements are usually in such minute quantities in everyday fertilisers that they are of little benefit. If soil is kept in good condition these Trace elements are usually present in sufficient quantity for most needs. If a plant needs more of a specific trace element, it is usually applied as a specialist fertiliser. For reference the trace elements are: -
Iron (Fe) - usually needed by acid loving plants like Azaleas and Rhododendrons.
Manganese (Mn) - as above.
Molybdenum (Mo) - needed by Brassicas.
Boron (B) - needed by root vegetables.
Zinc (Zn) - fruit and vegetables.
Copper (Cu) - Fruit and vegetables.
The following tables show organic and inorganic fertilisers and their respective uses, speed at which they work and the rate of application.
ORGANIC FERTILISERS
| Fertiliser | %N | %P | %K | Speed | Application oz/sq yd | Notes |
|---|---|---|---|---|---|---|
| Blood, Fish & Bone | 3.5 | 8 | 0.5 | Medium | 1 - 2 | A popular fertiliser that contains all three major nutrients |
| Chicken Manure Concentrate | 6 | 5 | 3 | 2 - 8 | Popular fertiliser used as base or top dressing | |
| Hoof and Horn | 14 | 2 | 0 | Slow - Medium | 2 - 4 | Apply 2 weeks before planting |
| Bone Meal | 4 | 20 | 0 | Slow | 2 - 4 | Apply in Autumn or Spring.Check that it has been sterilised for safety. |
| Soot | 3-6 | 0 | 0 | Quick | 4 | Allow to weather before use as a top or base dressing |
| Dried Blood | 12 | Trace | Trace | Medium | 1-2 | Apply in late Spring / Summer |
| Fish Meal | 6-10 | 6-12 | 1 | Slow - medium | 1-2 | Apply as a Winter /Spring base dressing |
| Wood Ash | 0 | 0 | 5-10 | Quick | 4-8 | Do not use on chalky soils |
HUMUS MAKERS
can either be dug into the soil or used as a surface mulch
| Humus maker | %N | %P | %K | Speed | Application bucket/sq yd | Notes |
|---|---|---|---|---|---|---|
| Farmyard Manure | 3.5 | 8 | 0.5 | Slow | 1 | Needs to be well rotted before use |
| Garden Compost | 6 | 5 | 3 | Slow | 1 | |
| Leafmould | 14 | 2 | 0 | Slow | 1 | Takes a long time to rot down but well worth the wait |
| Bark | 4 | 20 | 0 | Very Slow | 1" layer Usually used as a mulch | |
| Green Manures | 3-6 | 0 | 0 | Slow - medium | Dig in during autumn/winter |
INORGANIC FERTILISERS
| Fertiliser | %N | %P | %K | Speed | Application oz/sqyd | Notes |
|---|---|---|---|---|---|---|
| Superphosphate | 0 | 18 | 0 | Quick | 2-4 | Basic source of phosphate. Use as a base dressing. |
| Triple Superphosphate | 0 | 47 | 7 | Quick | 1-2 | Use as a base dressing |
| Sulphate of Potash | 0 | 0 | 48 | Quick | 0.5-1 | Basic source of potash. Use as a base dressing |
| Sulphate of Ammonia | 21 | 0 | 0 | Quick | 0.5-1 | Basic source of nitrogen. Tends to make soil more acidic. Favourite for greening up lawns |
| Potash Nitrate | 15 | 0 | 10 | Quick | 1-2 | Apply sparingly in Spring / Early Summer as a general top dressing. |
| Growmore | 7 | 7 | 7 | Quick | 1-4 | Very popular general fertiliser. Use in Spring as a dressing. |
| Nitrate of Potash | 16 | 0 | 0 | Quick | 1-2 | Apply in Spring. Much used in liquid form. |
| Nitrate of Soda | 16 | 0 | 0 | Quick | 0.5-1 | Very quick acting but scorches leaves on contact. Makes clay soils stickier. |
| Nitro Chalk | 16 | 0 | 0 | Quick | 1-2 | Contains lime. Useful for reducing acidity of soils |
| Phostrogen | 10 | 10 | 27 | Quick | 1tsp per 2 gal water | General purpose feed. Apply during growing season. Diluted can be used as a foliar feed. |
| Rock Phosphate | 0 | 10 | 0 | Slow | 4 | Apply in Autumn / Winter. Good for acid soils. |
Liquid fertilisers have the advantage over solids, that they are instantly available to plants. They also have the disadvantage that they do not remain in the soil for very long.
They have to be used on a regular basis, either to supply nutrients to high demand plants such as Tomatoes or to quickly correct deficiencies in the soil.
They come in various formulations the same as solid fertilisers. A general one would be marked as N7, P7, K7 on the bottle, a specialist rose fertiliser would probably be marked as N5, P7, K10.
They are especially useful for applying directly to the plant's leaves as a foliar feed. The plant takes the nutrients in almost instantaneously when applied in this manner. The feed can be applied either with a watering can or with a sprayer. A word of warning though, never foliar feed in direct sunlight as this will cause severe scorching to the foliage.
Home made Liquid fertilisers
Gardeners have for generations made their own liquid fertilisers. Any animal manure can be used but sheep manure is generally preferred. Comfrey is also very popular with gardeners. (See Comfrey Press) This is put into a hessian sack and suspended in a barrel of water. After a couple of weeks it is ready for use. For most applications it can be used neat but for should be diluted to half strength (mix with equal amounts of water) for foliar feeding or for use on seedlings. It contains about .8 % Nitrogen, .5 % Phosphorus and .4 % Potassium and a full range of trace elements. A tiny squirt of washing-up detergent in the spray reservoir will help the foliar feed to stay longer on the leaves for greater effectiveness.
• If other tap sharers are waiting, limit your watering to half an hour.
• Do not use sprinkler attachments (or similar) for watering plots. Hoses may only be used for filling water containers
• Do not leave hoses unattended when in use nor leave hoses attached to water taps when not in use.
• Never leave hoses running when you are not on the allotment site or overnight.
Remember that hose pipe and sprinkler bans imposed by the water companies apply to allotment gardeners and they can fine you for ignoring a ban.
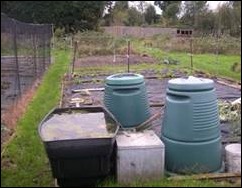
It is recommended that you cover your water container. This will prevent the entry of dirt, seeds, insect lava, leaves etc. It will also protect wildlife that might get trapped and drown.
At Hill the taps are turned off between December and March to avoid burst pipes etc over the winter period.
GROWING TREES ON YOUR ALLOTMENT

SHEDS, GREENHOUSES, POLYTUNNELS AND DECKING
MAXIMUM PERMITTED SIZES
Standard Plot SHED 10' x 8'
GREENHOUSE 10' x 8' OR POLYTUNNEL 20' x 10'
You are not permitted to erect any other type of building or structure on the allotment site.
DOGS

• Dog owners must make sure their dogs do not damage other gardeners’ plots
• Dog owners must comply with Dog Fouling By-laws and pick-up and appropriately dispose of dog waste.
LIVESTOCK AND BEE-KEEPING
You may keep bees on your plot if you are a member of the National Beekeepers Association.
You may keep chickens on your plot but the husbandry conditions laid down by the BCC (Birmingham City Council) must be observed. In either case, please discuss this in advance with the Site Secretary.
TYRES
Tyres should not be brought onto allotment sites.
DISPOSAL OF YOUR RUBBISH
You need to make your own arrangements for disposing of all the rubbish from your plot or plots. This includes disposing of both green waste and other non-compostable items. You must not deposit or allow anyone else to deposit rubbish anywhere on the allotment site. This includes the hedges and ditches around the allotment site and unworked allotment plots. Please do not add to any illegal rubbish dumped on your site.
Remember, money spent removing illegally dumped rubbish means that there will be less for other essential maintenance and site improvement work.
BURNING RUBBISH

• Before lighting a bonfire, think about other ways to dispose of your rubbish. Can you compost it on your plot or take it to the Re-Use and Recycling Centre?
• If you must have a fire, pick a time when the wind is not blowing in the direction of any neighbours.
• Do not burn green or damp materials or household rubbish that will cause smoke and never use petrol, methylated spirits or similar to light a fire.
• Never leave a fire unattended!
ASBESTOS ADVICE
Asbestos-based products (such as sheds, boards and containers) are not permitted on allotment sites and any such product should not be brought onto your plot.
Where asbestos items, such as shed roof sheets, already exist on a plot and are in a reasonable condition, they can be left in place, but they will need to be removed if the condition of the material deteriorates. Never break up asbestos sheets. Anyone unearthing suspect material should contact the Environmental Health Asbestos Officer. For further advice, including removal and disposal of asbestos, contact the Site Safety Officer.
SOIL AND MINERALS
Allotment gardeners must not take away or sell soil, earth, sand or gravel from the allotment site.
ADVERTISEMENTS
You must not erect notices or advertisements on allotment property.
MAINTENANCE OF ALLOTMENT FENCES AND PATHS
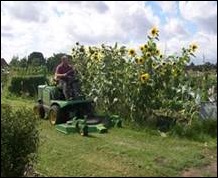
Grass mowing on minor paths between plots is the responsibility of the allotment gardeners on each side of the path.
REPAIRS AND ENQUIRIES
Have you spotted a damaged fence, leaking water tap or had difficulty opening the lock to your site? If so, please contact the Site Secretary.
STORESHED
The storeshed is available for the sale of various gardening supplies. You can see the price list here. Opening times are 10.30 a.m. to 12.30 p.m. on Sundays throughout the growing season - look for the red flag or storeshed rota list to see who is on duty. If you require service at any other times please see a committee member.
YOUR RENT
You, the allotment gardener, are a tenant of the Council and agree by signing The Agreement to pay the yearly rent in advance at the rate set by the Council. Your rent is due on October 1st for the following year. Payment can be made by Bank Transfer or in the clubhouse during October (see the planner for details). The rent schedule for the years 2025/26 and 2026/27 is shown below.
| Plot category | Rent 2025/26 | Rent 2025/26 65yrs+ | Rent 2026/27 | Rent 2026/27 65yrs+ |
|---|---|---|---|---|
| Mini (1/4 plot) Up to 84 m2 (100 sq yards) | £65 | £35 | £68 | £37 |
| Small (Half plot) 85 to 167 m2 (100 to 200 sq yards) | £81 | £42 | £85 | £44 |
| Standard (Full plot)168 to 334 m2 ( 201 to 400 sq yards) | £119 | £62 | £125 | £65 |
Details of the Birmingham City Council Allotment Rules can be downloaded by clicking here.
Please note that bonfires are no longer permitted in March.